How to Fix the Bootrec /Fixboot Access Is Denied Error on Windows

Here’s how to repair this repair utility.
Bootrec is a command line repair utility available in Windows Recovery Environment. You can use the Bootrec /fixboot command to fix system startup failures and boot errors on Windows 10 and 11.
However, when you execute the command, you may encounter the “Bootrec /Fixboot access is denied” error. This error may occur if the EFI structure is broken. Another reason is Boot Configuration Data (BCD) file issues.
You can use the startup repair utility or recreate the EFI structure and reconfigure the boot files to fix this error on Windows. Here’s how.
1. Perform an Automatic Repair
One way to fix this error is to perform an automatic repair from the Windows Recovery Environment. The automatic repair tool can fix problems that prevent Windows from loading.
You can perform an automatic repair without installation media. However, if that fails, create a new installation media with the latest version of Windows and then try again.
To perform a Startup Repair:
- Shut down your PC.
- Next, press the power button and start pressing the F11 key to boot into Windows Recovery Environment (WinRE). Note that while F11 is the most common way to boot into WinRE, it may still vary depending on the computer manufacturer. Check your computer’s manual to confirm.
- Wait for the PC to boot into Windows Recovery Environment.
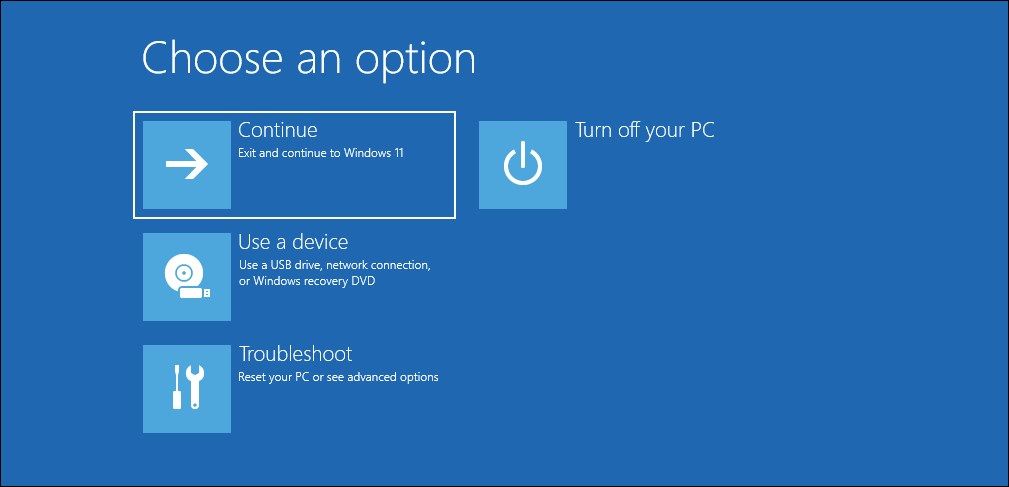
- Under Choose an option, click on Troubleshoot.
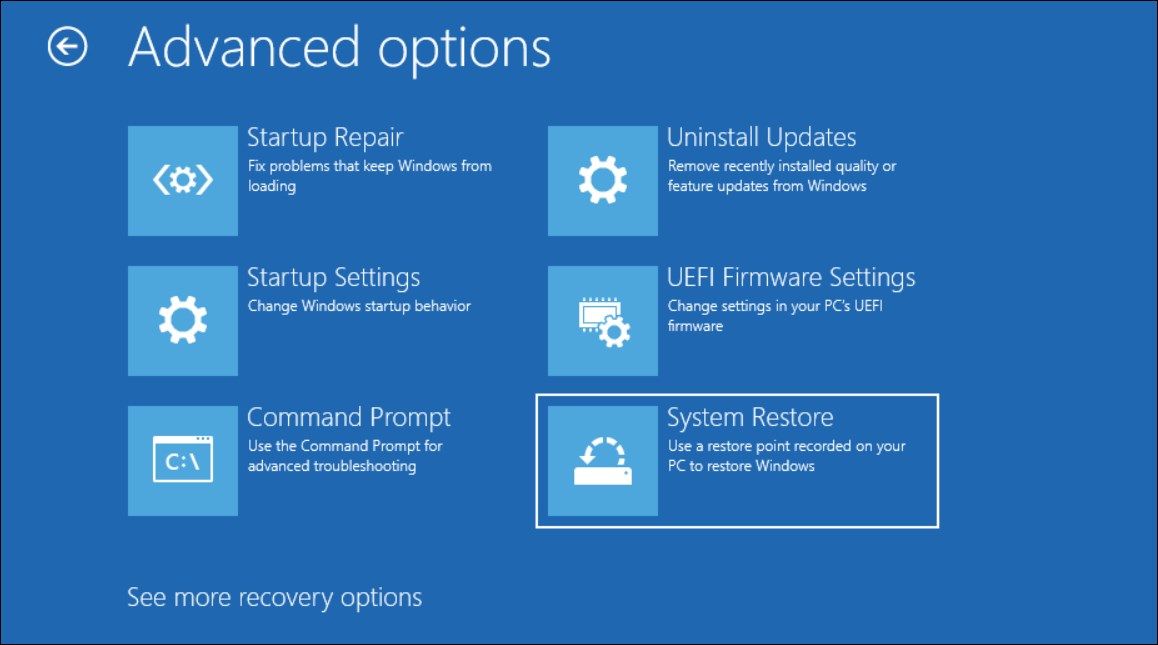
- Click on Advanced options.
- Click on Startup Repair under Advanced options.
- Your computer will restart and boot into the Startup Repair menu.
- Select your local user account from the available options.
- Enter the password for the account and click Continue. Leave it blank if your account doesn’t have a password.
- Windows will diagnose your PC for issues that may keep Windows from loading and apply the required fixes to resolve the issue. Then, follow any on-screen instructions and wait for the PC to restart.
2. Reconfigure the Boot Files
If the automatic repair fails to fix the problem, you can recreate the EFI structure and reconfigure boot files to execute the bootrec /fixboot command successfully. This process involves using the Windows Recovery Environment to access the Command Prompt and launch the diskpart utility. Here’s how to do it.
The below steps use a different method to access the Windows Recovery Environment than the one we demonstrated earlier. However, if you can access WinRE with the F11 key, skip to step 5 and continue.
- Shut down your PC.
- Next, press the Power button, and as the system starts to boot, press and hold the Power button again to shut down the computer.
- Press the power button again to start, and hold the power button to force shut down your computer. Then, repeat this step one more time.
- Once done, press the power button again and let the PC fully start.
- Once in the Automatic Repair screen, click on Advanced options.
- Click on Troubleshoot.
- Select Advanced options under the Troubleshoot section.
- Click on Command Prompt.
- In the Command Prompt window, type the following command to launch the diskpart utility and press Enter:
diskpart - Next, type the following command to list all the disks connected to your PC:
list disk - From the list, locate the Windows installation disk. For example, in this case, our system drive (on which the Windows OS is installed) is Disk 1.
- Next, type the following command to select your system drive:
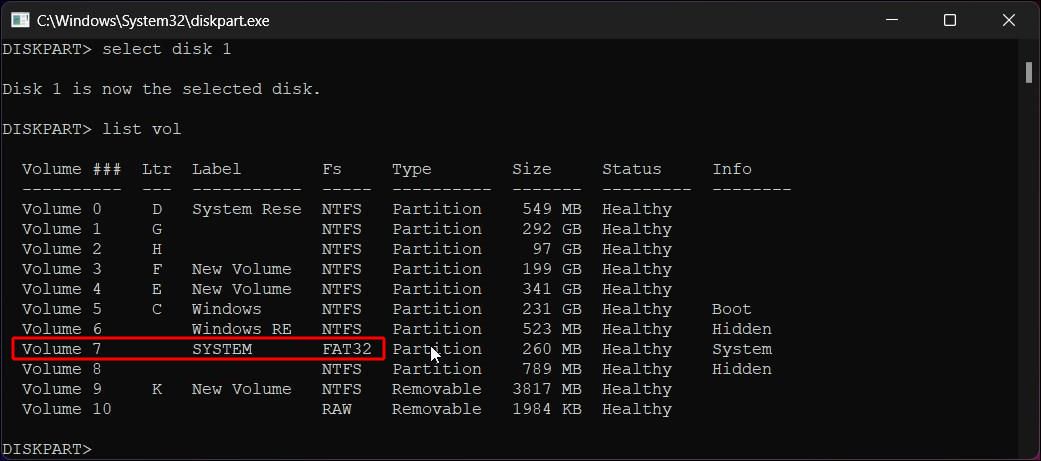
select disk 1 - In the above command, replace 1 with the disk number of your system drive.
- Next, type the following command to list all the volumes under Disk 1:
list vol - Here, locate the partition with EFI (Extensible Firmware Interface). It is usually smaller in size and formatted in FAT32 file system format.
- For this PC, the EFI partition is Volume 7.
- Next, type the following command to select the EFI partition volume:
select vol 7 - In the above command, replace 7 with the correct volume number for your PC.
- You’ll need to assign a new letter to the selected volume. So, type the following command and press enter:
assign letter=N: - Make sure no other volume has the same letter assigned to it. If yes, use a different letter instead.
- Type the following command to exit diskpart:
exit - Type the following command to select the newly assigned volume:
N: - In the above command, replace N with the correct letter if you used a different letter for Step 20.
- Next, type the following command to copy boot files to the EFI partition in the V volume:
bcdboot C:windows /s V: /f UEFI - Once executed, type exit to close Command Prompt.
- Go back to the Windows Recovery Menu and click on Continue. Wait for the PC to restart.
- Try to run the bootrec /fixboot command to see if the error is resolved.
The bootrec /fixboot command access is denied error can occur due to system file corruption. In this instance, you can use an installation media with the latest version of the Windows OS to run the bootrec /fixboot command and fix startup issues.
To do this, you must have a USB flash drive with at least 8 GB of storage, and a legally downloaded Windows 11 ISO image to create a bootable drive. You can also reformat your USB flash drive using the Disk Management tool. If your PC is in a non-bootable state, use a different computer to prepare an installation media.
- Create a backup of any data on your USB storage drive and connect it to your PC.
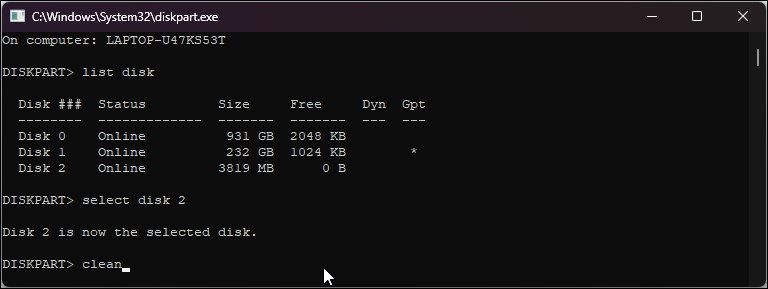
- Next, type diskpart and click on diskpart to open the command-line tool. Click Yes if prompted by UAC.
- In the Command Prompt window, type the following command and press enter:
list disk - This will show all the disks connected to your PC, including the USB drive. Note down the disk number for your USB drive.
- Next, type the following command to select your USB drive.
select disk - In the above command, replace # with your disk number. It is imperative to select the right disk as you’ll be erasing all the data from the drive. Since we have three disks connected to the system, the USB drive shows as Disk 2. So, the full command will look something like this:
select disk 2 - Next, type the following command to erase all the data from your USB drive:
clean - This may take a moment. When the DiskPart succeeds in cleaning the disk message appears, close diskpart.
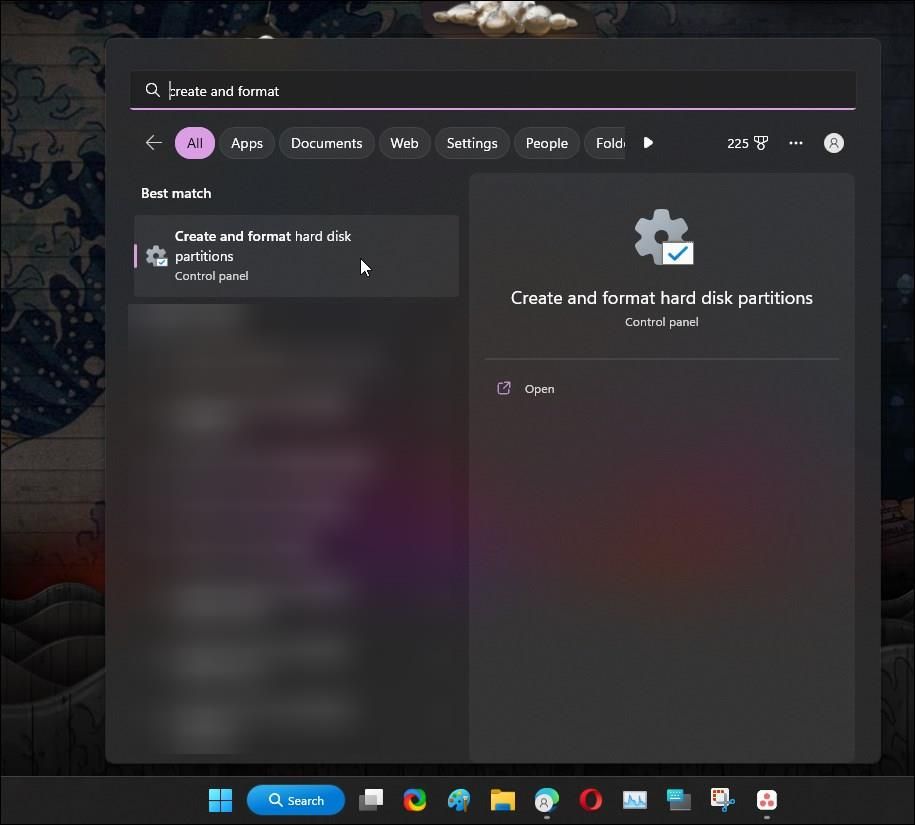
- Next, press the Windows key and type disk management. Click on Create and format hard disk partitions option from the search result.
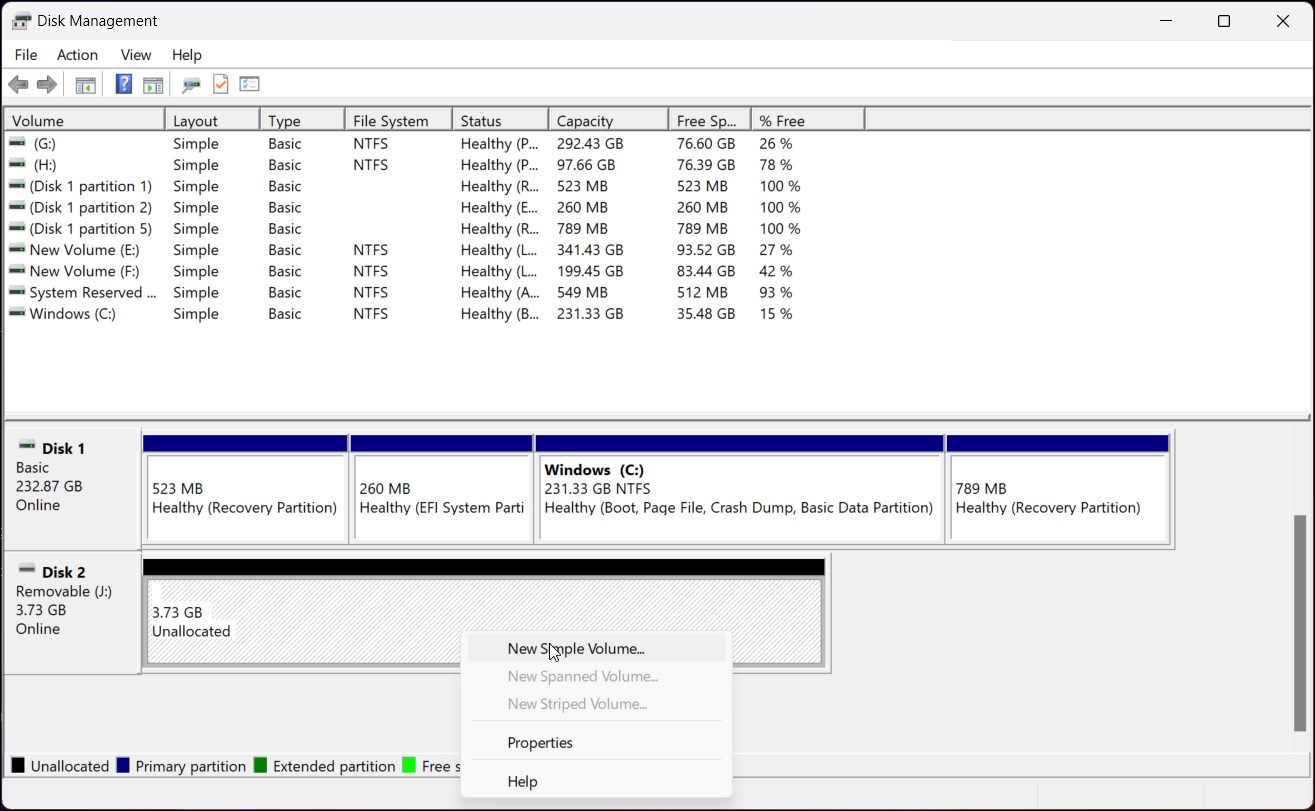
- In the Disk Management tool, locate your USB drive.
- Right-click on your USB drive and select New Simple Volume.
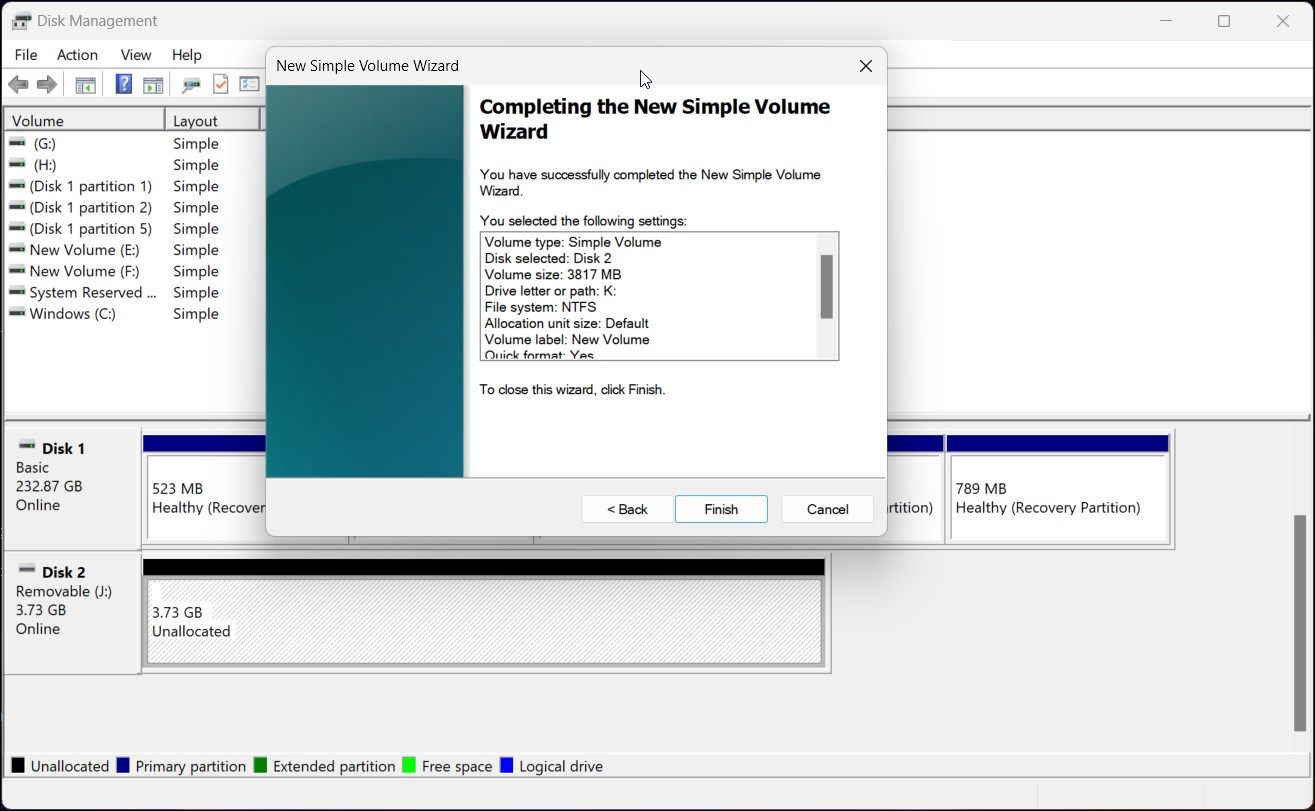
- In New Simple Volume Wizard, click Next > Next > Next > Finish to format and create a new volume. This process may take some time, so wait till the USB drive is assigned a new letter.
- Next, right-click on the USB drive and select Mark Partition as Active. If your PC is set to UEFI, you don’t need to mark the partition as active.
- Next, follow these steps to create a USB bootable drive.
- Once the installation media is ready, connect it to your PC.
- In the Windows Setup screen, click Next.
- Click on Repair your computer.
- Click on Troubleshoot.
- Select Command Prompt.
- In the Command Prompt window, type the following command and press Enter:
Bootrec /fixboot - Wait for the Operation completed successfully message, which should fix any issues with your system startup.
- Type exit and press Enter to close Command Prompt.
- Disconnect your USB drive and restart your PC. Your computer will restart normally without startup issues.
Fix the Bootrec Fixboot Access Denied Error on Windows
Fixing the bootrec fixboot access denied error can be a little tricky. Start with running the built-in startup repair tool in the Windows Recovery Environment. If the issue persists, you can create the EFI structure or run the bootrec fixboot command using an installation media.

