How To Fix Laptop Camera Not Working

Regardless of whether you own an HP, Dell or Lenovo laptop. The webcam isn’t necessarily as easy to fix as a standalone one. You can’t simply toss it out and plug in a new one.
However, trying to fix a built-in laptop webcam shouldn’t be too difficult unless the hardware is damaged, so take a crack at it yourself before taking the computer to a repair technician.
Why isn’t My Laptop Camera working
Often, problems with your integrated webcam are related to software configuration issues. On time when that might not be the case is if your camera has suffered some kind of physical damage.
If the computer was hit or had liquid spilled on it, the problem with the camera might be a hardware issue. If that’s the case and problems appeared right after the damage, it’s more likely to be a hardware issue.
A camera that doesn’t work isn’t the only sign of a webcam problem. Sometimes it might have a delayed appearance or look like lines are running down it. It might not focus correctly. Take a break from whatever application you’re using with the webcam and try to fix it as soon as the problem pops up.
How to Fix Laptop Camera Not Working
There are a few steps to try when you can’t get the integrated webcam to activate. You can always try several things until you find the right one. Remember to reset your settings as needed when you finish one part of the troubleshooting.
Before You Begin
There are a few things you should check before you start troubleshooting.
- Restart your computer.
- Restart the program in which you were using the webcam.
- Try using the camera on a different user profile.
- Try a different program that uses the camera. You can always check using an online program that uses webcams, too.
- Update the program with which you’re trying to use the camera.
- Update Windows. Issues with Windows can cause all kinds of problems with your computer and it’s one of the quickest ways to make sure everything on your computer is functioning correctly.
- Use the troubleshooter. Just follow the steps to ensure everything it can detect is functioning correctly. You can access a variety of troubleshooters from the Update and Security menu in Settings.
- Try pressing FN+F6. Sometimes this combination can enable and disable the webcam but it mostly works for MSI laptops only. If it doesn’t work, press it again to put it back to where it was initially.
Doing these will help eliminate fundamental issues that can affect your integrated webcam. It might save you from some troubleshooting if one of the steps works.
Look for a Disable Button on the Keyboard
Sometimes all you need to do is tap the webcam enable/disable key on the keyboard. On some laptops, it’s the F8 key, for example. Check your keyboard closely and look to see whether you have one. If your webcam is disabled, it could simply result from a shortcut key on your laptop keyboard.
Check if Camera Is Enabled in Device Manager
It’s possible to disable the integrated webcam in your settings. It’s a great trick for when you don’t want the camera to come on for any reason. However, as long as it’s disabled, you won’t be able to use it in any applications, and the area where the image would appear will probably be a black box.
- Type “Device Manager” into the Windows search bar and open the corresponding program.
- Expand the category for either Imaging Devices or Integrated Camera depending on your setup.
- Right-click on the camera entry.
- Click Enable Device.

- Try to use your camera again.
If it’s working, you don’t need to do anything else. It should stay enabled until you disable it again.
If it says it’s enabled, try clicking Disable Device and then wait a moment before choosing Enable Device again. It’s possible that just switching it from enabled to disabled and back to enabled might fix the issue.
Check The Windows Settings
Windows can turn off a webcam hooked into the computer by clicking a simple slider. If you turned the slider to the wrong option by mistake, it might be preventing your webcam from working correctly.
- Press the gear icon to open Settings from the Start Menu.
- Click Privacy.
- Choose Camera in the left sidebar menu.
- Click “Change” if it says “Camera access for this device is off” and turn the slider to On.


- Under the “Allow apps to access your camera” menu, Turn the slider to On.
- Try to use the camera again.
This setting should stay the same until you manually change it again.
Check Whether the Program Has Camera Access
When you’re checking the camera settings in Windows, you can scroll down a bit more to see which apps have camera access. If the slider next to the program you’re using is turned off, then the program won’t be able to use the camera. Simply move it to the right setting, and then try using your camera again.
Check for Driver Updates
Your integrated webcam requires specific drivers to run. If they aren’t installed, the camera might not interface with the rest of the device. Installing drivers can be done from a disc, but you can also install them with the manufacturer’s software.
- Type “Device Manager” into the Windows search bar and open the corresponding program.
- Expand the category for either Imaging Devices or Integrated Camera depending on your setup.
- Right-click on the camera entry.
- Click Update Driver.


- Follow the steps to see whether you have the correct driver installed.
Windows will tell you whether your software is up to date, and it will help you find the new software if needed. Restart your computer once the process is complete and use the integrated webcam again.
Uninstall Your Camera
If your integrated webcam has experienced a severe malfunction, uninstalling and reinstalling it might help fix the problem. Windows should automatically detect and install it once you’re done.
- Type “Device Manager” into the Windows search bar and open the corresponding program.
- Expand the category for either Imaging Devices or Integrated Camera depending on your setup.
- Right-click on the camera entry.
- Click Uninstall Device.


- Click Uninstall to confirm that you wish to complete the process.
- Wait for Windows to finish and wait two minutes to see whether it automatically detects and installs the camera.
- If it doesn’t, click Action in Device Manager.
- Choose Scan for Hardware Changes.


- Wait for the process to complete, and the camera should be installed.
- Try using the camera again.
The camera will become completely unavailable during this process. However, there shouldn’t be any issue reconnecting it since it was already installed and detected by the computer.
If you find that the Device Manager doesn’t recognize the camera in any categories, then there’s a chance it isn’t hooked up into the system or has become disconnected over time. That could signal a physical problem that needs to be addressed. Even a non-functioning camera detected by the PC should be listed under the Device Manager.
Scan your Antivirus Settings
Some antivirus programs have settings that completely block the camera. You can quickly disable it and then try to use the camera with the antivirus off.
If it works, go through your antivirus settings and add an exception for the camera. You don’t want to keep the antivirus software switched off every time you’re using a video connection.
Manufacturer Settings
Some computer manufacturers have an app that helps protect a user’s privacy. For example, SCM is a Lenovo app that some people have found that switches off their cameras.
Look for such an app on your computer and comb through the settings to ensure you don’t have a privacy mode enabled with your webcam.
BIOS Settings
Some computers have a BIOS setting that can disable a camera, including an integrated webcam. There isn’t a straightforward way to adjust this because it varies depending on the BIOS manufacturer. Check your BIOS to see whether restricting camera access is an option and, if it is, whether it’s enabled.


If you find the setting and can enable camera access, make sure to save your settings before exiting BIOS, or they won’t take effect.
Reset Your Computer
If it won’t work, there’s no physical damage, and you think it might be a computer issue, consider resetting Windows. You can do a clean install and reinstall the drivers from scratch too.
However, it might be better to have the webcam checked for damage first to avoid backing up and reinstalling your operating system.
Inspect for any Physical Damage
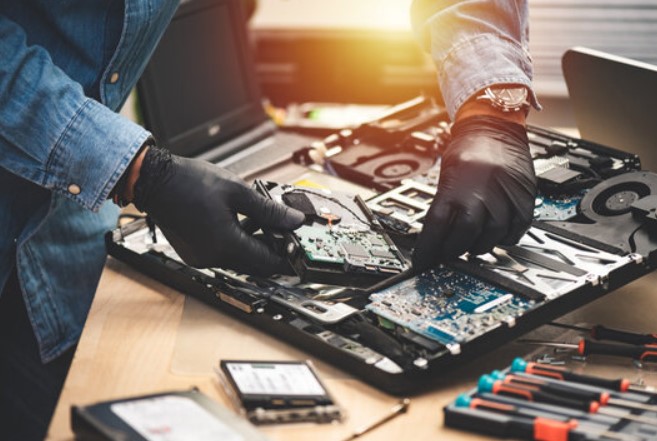
If there’s physical damage to your webcam, you might need to contact a repair center to get it fixed. While you can take apart the computer, check the connections on the webcam, and repair or replace it, you might void your warranty or damage other delicate parts. Decide whether you want to risk if all software fixes have failed and you think the issue might be physical damage.
If you decide to replace your integrated webcam, make sure to get one compatible with your device. Whether you’re using a laptop or a Windows tablet, it might require different connections, sizes, and software than another similar device.
One easy-to-do fix that some people try is lightly squeezing the bezel around the webcam area. You don’t want to crush it. You just want to exert some pressure to make sure any loose connections are tightened. It’s not a guaranteed fix, but it can work in some situations.
Losing access to your integrated camera can be a pain but don’t forget a temporary USB camera can be a good holdover until you get it working again. Whether the problem is software, connections, or damaged hardware, you don’t have to go entirely without a camera as long as you have access to an external one.
USB Webcam Isn’t Working
If you’re having a problem with an external webcam, try a few different things to investigate whether the problem is the camera itself or the settings on your computer.
Disconnect and Reconnect Camera
Disconnect the USB camera from the computer and restart your machine. Once that’s done, plug it back in. Try to see whether simply hooking it in one more time will make it work.
Test and Troubleshoot
Test the USB camera on a different computer. If there’s a problem with the cable or something similar, it won’t have any connectivity on any device. That lets you know there’s some kind of physical problem with the USB camera and that it will need repair or replacement.
Scan for Hardware Changes
Sometimes your computer simply doesn’t recognize that a new device has been plugged in. Try to scan for hardware changes to see whether that helps detect the USB webcam.
- Open the Device Manager.
- Right-click on the name of your computer at the top of the list.
- Choose “Scan for hardware changes” and follow the prompts to install any device drivers Windows finds.


If you haven’t installed any drivers yet and Windows doesn’t find any, try downloading them from the manufacturer’s site and installing them on your PC.
Uninstall the USB Webcam
If the webcam appears and still isn’t working, try uninstalling it to see if Windows can do a fresh and functional installation.
- Open Device Manager.
- Expand the Universal Serial Bus controllers category.
- Right-click on the webcam in that list.
- Click “Uninstall device.”


- Click “Uninstall” and then follow the prompts to finish.
Windows should detect and install the camera again after the process is complete.
Frequently Asked Questions
Why Can’t I Access Any Camera Controls?
If you can’t access any camera controls, the problem is likely to access rights. Check with the admin in charge of your computer to ask whether you lack permissions. If you’re the admin, try running the app that controls the camera with administrator privileges.
My Camera Light Turns on, but There’s No Signal?
Make sure the camera is enabled, and the drivers are up-to-date. It appears the laptop is getting the message that the camera should be on, but the camera itself isn’t functioning. Disable any programs designed to block the camera, like privacy screens.
Camera Not Working on Certain Apps?
Make sure those apps have camera permissions in Windows settings. As detailed above, you may have to move the sliders to grant them the right to use the webcam.
My Camera Is Stuck
Ensure that there isn’t anything physically impeding your camera, like dirt or debris. If it has a little window you can open and close, make sure it’s fully retracted. If something inside has malfunctioned, it may require a repair or replacement.
Camera App Won’t Open?
Restart your computer and try again. If it still doesn’t work, search for the Camera app in the Windows Store and update it. If there are no updates available, do a System File Checker scan to ensure you aren’t experiencing any disk problems.


