Is the Intel Unison App Not Working on Windows 11? Here’s How to Fix It
Intel Unison is an excellent app for connecting your Android or iPhone to your Windows 11 computer. However, like any other app, Intel Unison isn’t devoid of issues. If you rely on Intel Unison to read text messages and answer phone calls from your computer, it can be inconvenient when the app stops working properly.
If you, too, are having trouble using the Intel Unison app on Windows, here are some troubleshooting tips that’ll help.
1. Run the Windows Store Apps and Bluetooth Troubleshooters
The Windows Store Apps and Bluetooth troubleshooters can automatically detect and fix issues with Universal Windows Platform (UWP) apps and your Bluetooth devices on your PC. You can try running these tools and see if that gets the Intel Unison app working again.
To run the Windows Store Apps troubleshooter:
- Open the Start menu and click the gear-shaped icon to launch the Settings app.
- In the System tab, click on Troubleshoot.
- Select Other troubleshooters.
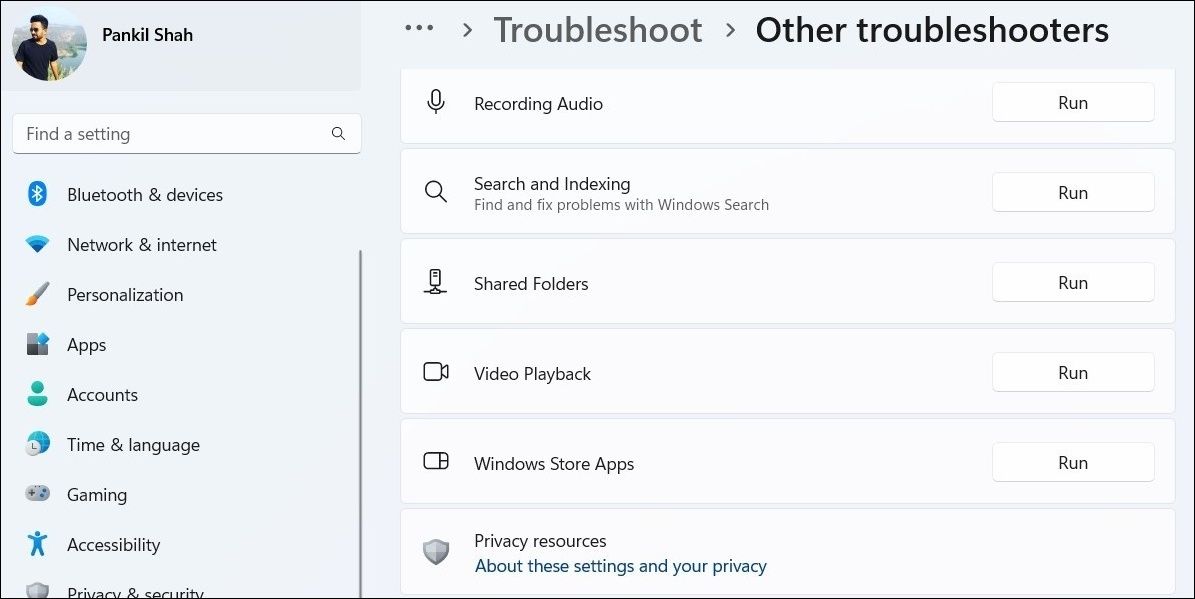
- Click the Run button next to Windows Store Apps.
- Next, click the Run button next to Bluetooth.
Follow the on-screen prompts to run the troubleshooters and then try using the Intel Unison app.
Still experiencing Bluetooth issues? Check our guide on fixing Bluetooth pairing issues on Windows and follow the steps outlined there.
2. Allow the Intel Unison App to Run in the Background
If you’ve disabled background app permission for Intel Unison, it may fail to sync your data when you are not using it. To avoid this, you must enable background app permission for the Intel Unison app. Here’s how to do it.
- Right-click on the Start icon or press Win + X to open the Power User menu.
- Select Installed apps from the list.
- Scroll through the list or use the search tool to locate the Intel Unison app. Then, click the three-dot menu icon next to it and select Advanced options.
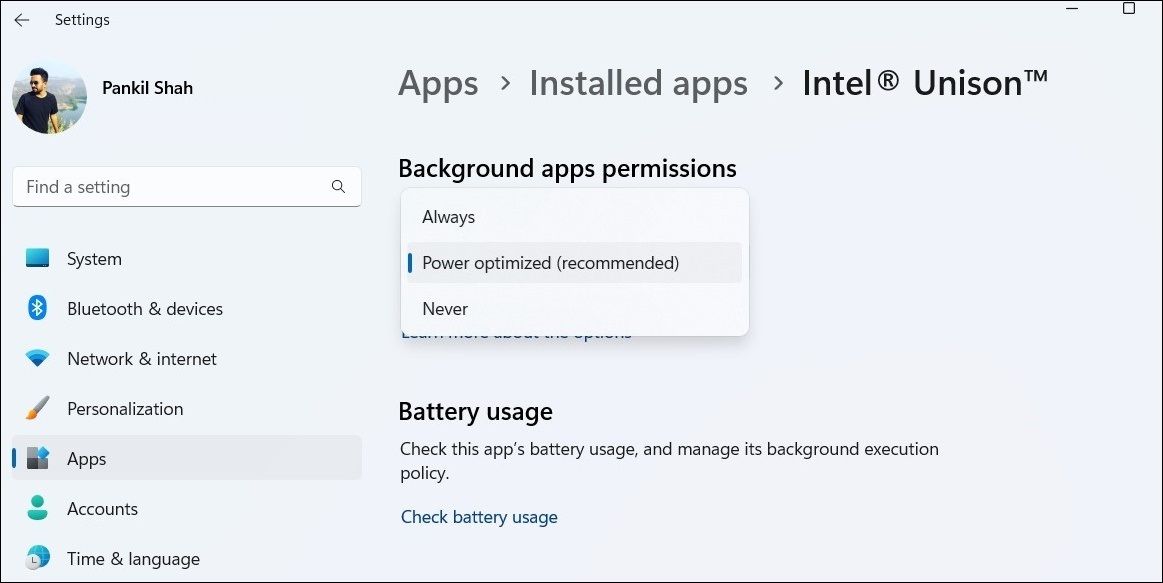
- Click the drop-down menu under Background apps permissions and select Always.
3. Allow Intel Unison App Access to Your Phone Calls and Notifications
The Intel Unison app on Windows requires permission to access phone calls and notifications. You need to ensure that these permissions are enabled. Here’s how to check.
- Open the Intel Unison app using the search menu.
- Click the Settings tab in the bottom left corner.
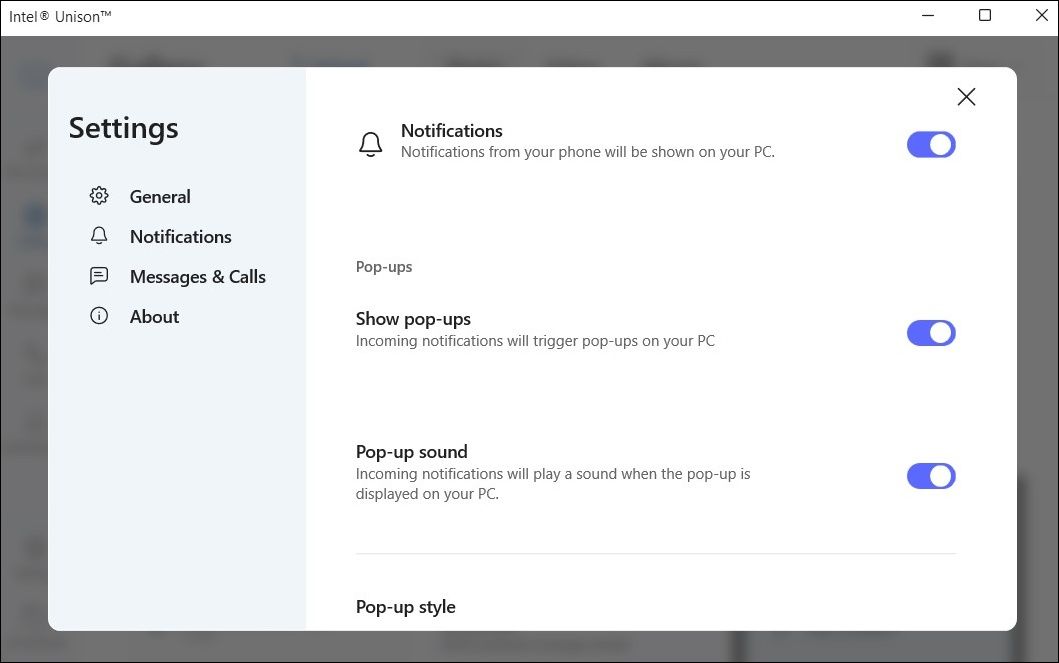
- Select Notifications from the left sidebar.
- Enable the toggle next to Notifications.
- Further, scroll down to App notifications, and use the toggles to enable notification permission for individual apps.
- Next, switch to the Calls tab and enable the toggle for Allow phone calls.
4. Turn Off Battery Saver Mode
When you enable battery saver mode, Windows pauses background app activities on your computer. While this is a great way to improve battery life on Windows, it may prevent apps like Intel Unison from working efficiently.
To avoid any performance issues, it’s best to turn off battery saver mode on Windows. Here’s how you can go about it:
- Press Win + I to open the Settings app.
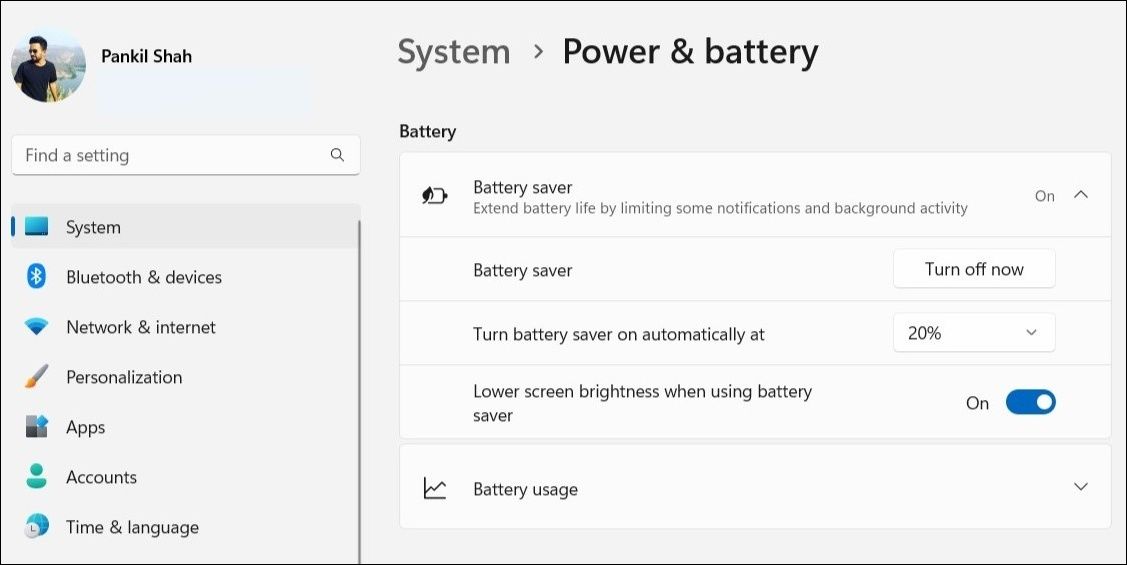
- In the System tab, click on Power & battery.
- Under Battery, click on Battery saver and click the Turn off now button.
5. Disable Any Active Third-Party Antivirus Programs
At times, third-party antivirus programs on your PC can get too cautious and prevent apps from exchanging files and syncing data. To check for this possibility, you need to temporarily disable your antivirus program.
You can typically do this by right-clicking the antivirus program’s icon in the system tray and selecting Disable until next restart. However, the instructions will differ between antivirus programs, so if you’re stuck, check your antivirus’ official help documentation for instructions.
Once disabled, try using the Intel Unison app again. If this solves your problem, you can go through your antivirus program’s settings and whitelist the Intel Unison app.
6. Disconnect and Reconnect Your Phone
Connection issues between the Intel Unison app and your phone can also cause the app to stop working on Windows. In most cases, you should be able to resolve such issues by disconnecting and reconnecting your phone.
This should re-establish the connection between Windows and your phone, resolving any issues caused by misconfigured settings.
To disconnect your phone from the Intel Unison app, follow these steps:
- Open the Intel Unison app on your PC.
- Click the computer icon in the top left corner and select Manage my devices.
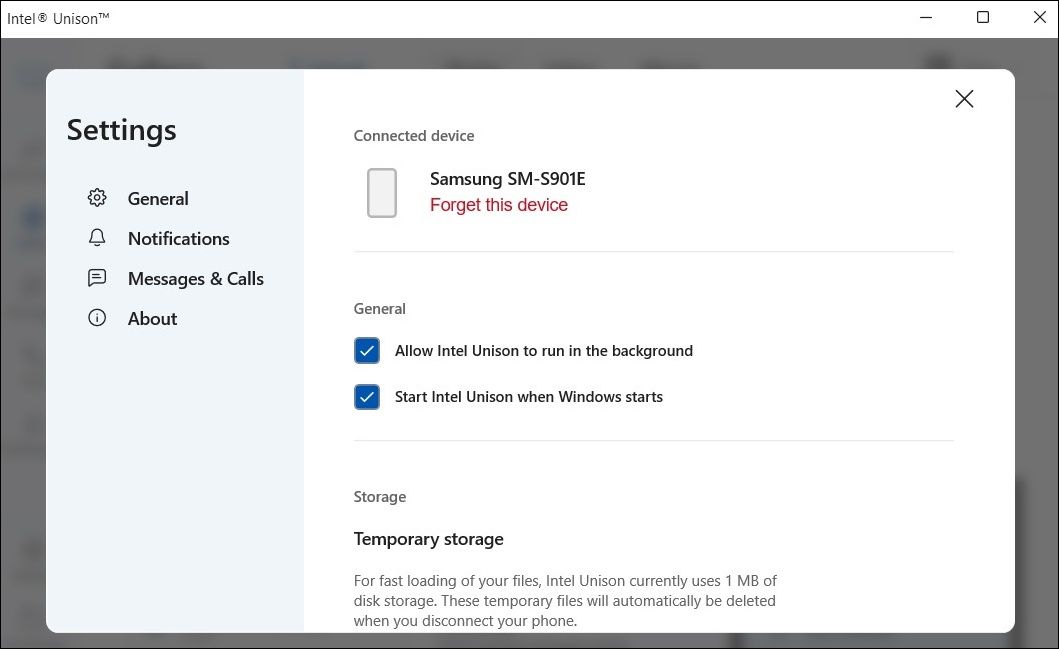
- Click the Forget this device option.
- Next, open the Intel Unison app on your Android or iPhone and scan the QR code on your PC.
- Follow the on-screen instructions to pair your phone.
7. Repair or Reset the Intel Unison App
Both Windows 10 and 11 include a useful repair tool for fixing app-related issues. Check out our guide on how to repair apps on Windows to fix the Intel Unison app without affecting your data.
Wait for the repair process to complete and then try using the app again. If the problem persists, try resetting the app from the same menu. Doing so should delete all the app data and reset the app to its default state.
8. Reinstall the Intel Unison App
Finally, if none of the above solutions work, you can try uninstalling and reinstalling the app. If you need help with that, check our guide on how to uninstall apps on Windows and follow the instructions outlined there.
Once removed, head over to the Intel Unison page on the Microsoft Store to download the Intel Unison app. Hopefully, this should help resolve the issue.
Fixing Intel Unison App on Windows 11
Issues with the Intel Unison app should not force you to look for alternatives. One of the above-mentioned fixes should get the app back up and running on your Windows PC.
If you have an Android phone, you can also use Microsoft’s Phone Link app to sync it with a Windows computer.

