“Your Computer Restarted Because Of A Problem” On Mac

Sometimes, out of nowhere, you might encounter a “Your computer was restarted because of a problem” error on a Mac. And when this happens, your system will restart abruptly, without saving your task at hand or being able to restore it thereafter. You’ll then lose all your unsaved data.
This error message usually states that there is an ongoing issue with the kernel system. Technically, it’s also known as a ‘kernel panic’ because your system might have difficulty recovering from the aforementioned error message. The issue is mostly caused by incompatible hardware/software. However, there are other factors at hand as well.
But, whatever the cause may be, there are various different ways to fix it. And that’s exactly what we’re going to discuss here in this article. So, let’s get right to the point!
Why Am I Seeing This Error Prompt?
- Unsuitable peripherals
- Conflicting kernel extensions
- Too many startup apps
- Low system storage
- Corrupted NVRAM data
- Hardware/software issues
- Outdated OS
Fix: “Your Computer Restarted Because of a Problem” on Mac
Ironically, the first thing you can do when you get this error message is to restart your computer properly. Although the issue is regarding a self-restart, manually shutting down and turning on your system after some time can fix any temporary session issues.
But if this doesn’t seem to work, follow all the steps shown below.
Unplug All Peripherals
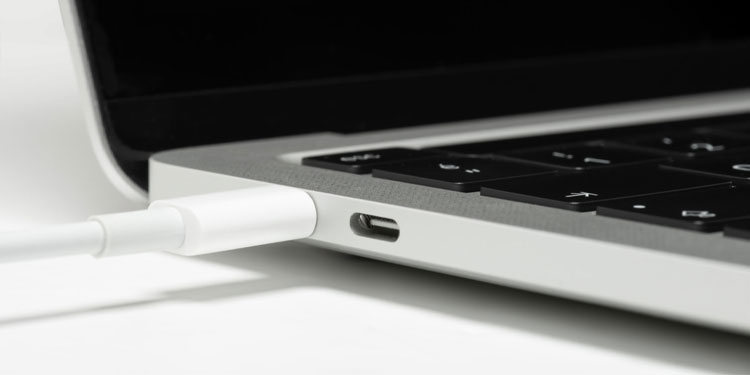
Non-Apple peripherals are sometimes known to cause compatibility issues on an Apple computer. So, to avoid this, disconnect all connected peripherals, especially the ones that are from other third-party developers, including the RAM and PCI cards as well.
However, if your computer starts to function normally after unplugging these devices, you can plug them back in one by one.
Remove Conflicting Kernel Extensions
Conflicting kernel extensions can disarray the way your system operates and cause a plethora of different issues, one of them being the above error prompt. Third-party applications and plugins can cause compatibility and stability issues on a Mac, and the suspicious ones should be removed from the system.
However, before you jump in to do so, let’s first check if third-party apps/extensions are really the cause of this issue. For this, we have to boot into safe mode.
For Intel Macs
- Shut down.
- Hold Shift and power on your Mac.
- Release Shift after you reach the login menu.

- Log in to your computer.
For Apple Silicon Macs
- Shut down.
- Keep holding Power while the Mac starts up.
- Release Power only after you reach Options.

- Then, select a drive (bootable) to start up your system.
- Now, hold Shift and Continue in Safe Mode.
Your system will now boot in safe mode. In this mode, non-mandatory drivers and interfaces are not enabled, and your system utilizes only the minimum necessary processes.
So, if your system works fine in safe mode, it confirms that the problem is caused by third-party extensions that are operating in kernel mode. To remove such extensions,
- Restart your computer normally.
- Press Command + Space to open the Spotlight.
- Type and select Terminal.
- Enter
kextstat.
This will return a list of kernel extensions on the system. - Here, if you notice that any extension doesn’t start
com.apple.*, it’s from a third-party application.
- So, if you’re able to track this particular extension back to the related application, remove this application from the system.
Manage Your Startup Items
Some programs automatically start up every time you turn on your computer. So, certain resources have to be allocated to these applications while your system is starting up. This can unnecessarily clog up your processor and could cause some mishaps, including the one you’re facing right now.
So, you have to disable this automatic startup feature, and here’s how:
- Open Finder.
- From the menu bar, go to Apple > System Preferences.
- View the Users & Groups settings.
- Click on the padlock to enable new changes.
- Now, go to Login Items.
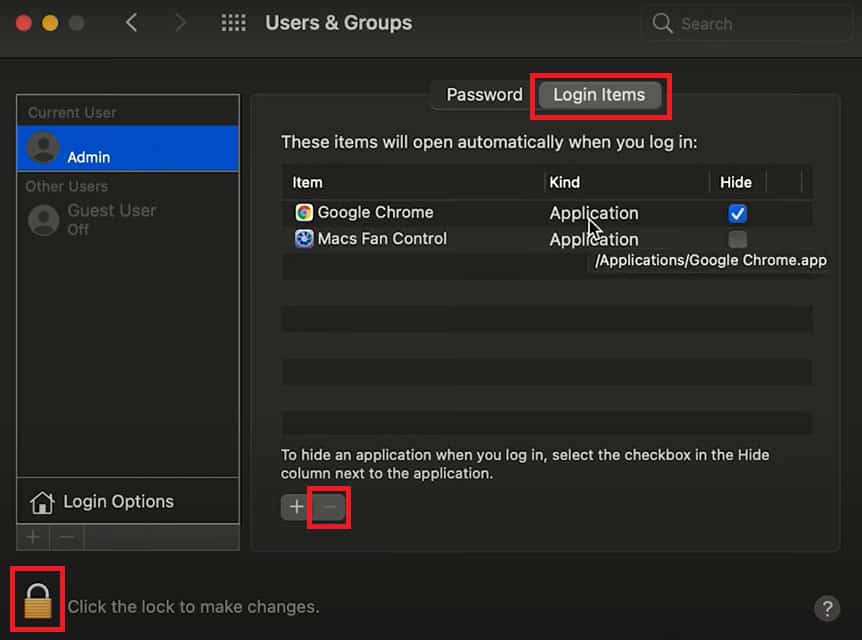
- Here, if you see an unwanted application present on the list, highlight it and click ‘-’ sign.
- Click on the padlock to save your changes.
Manage Your Storage
When your system storage is almost full, it cannot operate efficiently. It’ll have start-up issues and power issues, such as this one. So, if you notice that your Mac’s storage is getting full, you have to clear up a considerable amount of storage.
- Open Finder.
- From the menu bar, go to Apple > About This Mac.
- Navigate to Storage.
- Wait until the system scans for your storage information.
Then, you can see your storage status, amount of space available along with the files taking up most of the space.
- Choose to Manage your storage.
- On the Storage Management window, you have options to either Store in iCloud, Optimize Storage, Empty Trash Automatically, and Reduce Clutter.
These built-in options work to reduce and optimize your storage space. So, select the ones you like.
Reset NVRAM
Whenever there are software or application-related issues, resetting the NVRAM is a preferable option. That’s because the NVRAM is responsible for controlling and ensuring that the installed software works well. So, if the data within the NVRAM gets corrupted, you might issue such as the aforementioned error prompt.
But, to resolve this issue, you can reset the NVRAM. For M1 Macs, a simple system restart resets the NVRAM. But for Intel Macs, the exact process should be carried out while the system starts up.
- Shut down.
- Press Power once and turn on the system.
- Immediately after that, hold Command + Option + P+ R.
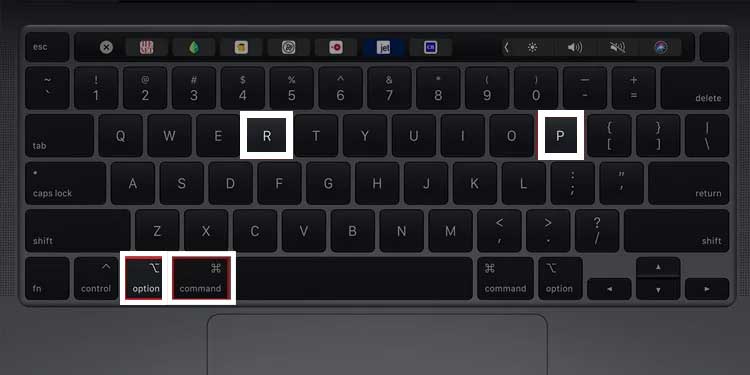
- Hold these keys until the system fully starts up.
First Aid Disk Drives
To resolve hard disk issues, and failures and also to repair your disk permissions, you can go for a First Aid test. This feature scans your drives for any signs of errors and attempts to repair them if possible.
- Press Command + Space to open the Spotlight.
- Type and enter Disk Utility.
- Highlight your disk from the left panel.
- Click on First Aid.

- On any prompt messages, choose to Run the test.
- Once the process completes, restart your computer.
Run Apple Diagnostics
Similar to the First Aid test, Apple Diagnostics is a tool that scans your system for any possible hardware issues. But, unlike First Aid, it will not fix the issue particularly.
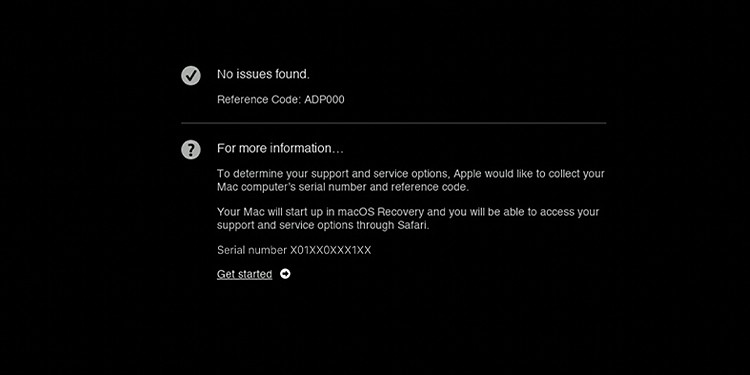
It will, however, perform a detailed scan of the system. And, if there’s any error, you will receive a reference code related to that particular error. You can then google this reference code to get a detailed description of the problem you’re facing.
So, to run Apple Diagnostics,
For Intel Macs
- Shut down.
- Unplug external peripherals.
- Press Power once and startup your system.
- Immediately after that, hold D on your keyboard until you get language options.
- Select a language you can understand.
- Apple Diagnostics will then start to scan your system for any hardware issues.
For Apple Silicon Macs
- Shut down.
- Unplug external peripherals.
- Keep holding Power while the Mac starts up.
- Release the hold only after you see Options.
- Then, press Command + D.
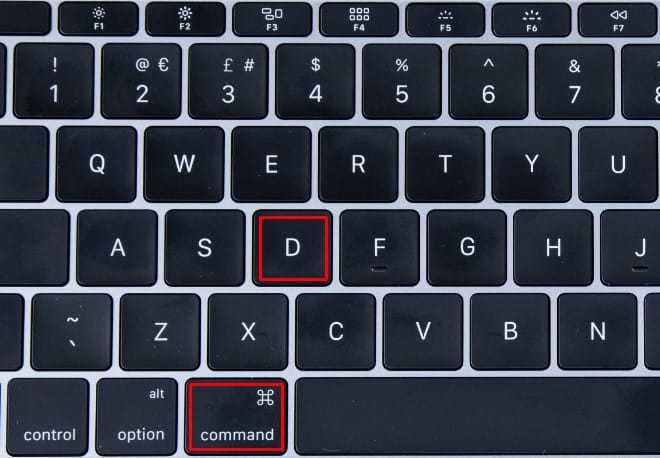
- Apple Diagnostics will then start to scan your system for any hardware issues.
Update macOS
macOS often releases new software updates with new compatibility patches and stability fixes. So, if your system is having kernel issues time and again, it’s time to upgrade your Operating System to the latest build. The latest patch can permanently fix your problems.
- Open Finder.
- From the menu bar, click on Apple > About This Mac.
- Choose to perform a Software Update.
- Wait until your system completes the scan.
And, if it gives you a list of available upgrades, click on Update Now to upgrade your OS.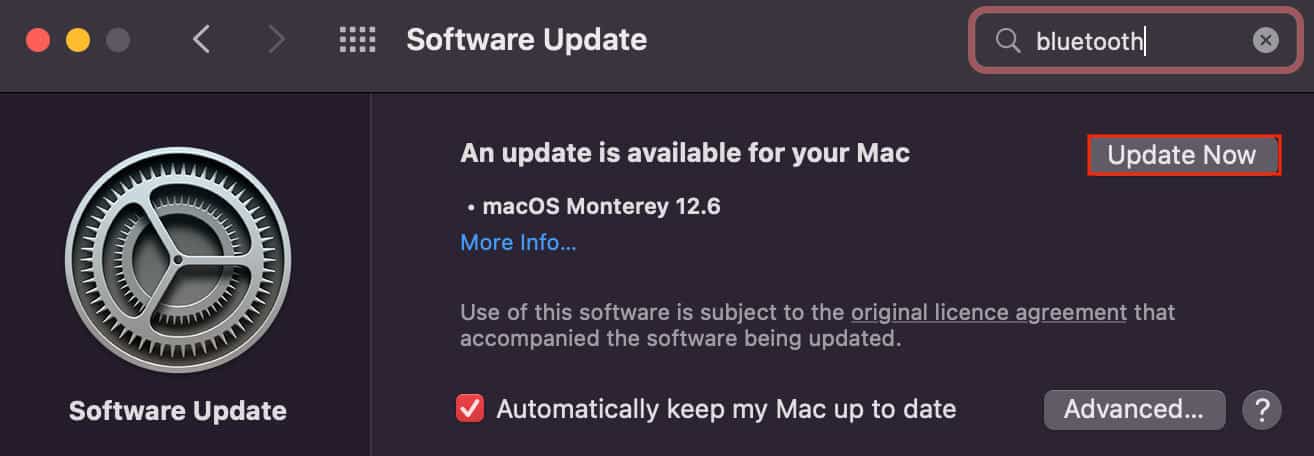
Reinstall macOS
If no methods work and you’re still stuck with the “Your computer was restarted because of a problem” error message, you have to resort to reinstalling the entire OS once again.
However, you have the option to reinstall macOS on top of the previous build to avoid losing any data within the system. So, a fresh system reinstall could be the solution for you.
Reinstalling macOS is done through the Recovery Mode. Here’s how you enter this mode,
For Apple Silicon Macs
- Connect to the internet.
- Shut down.
- Keep holding Power while the Mac starts up.
- Release the hold only after you see Options.
- Then, click Options.
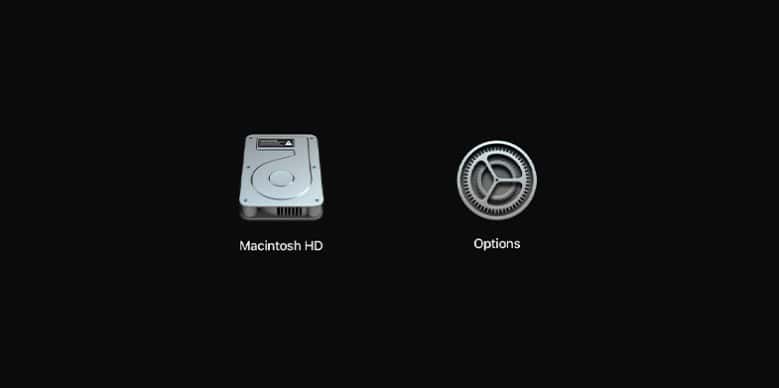
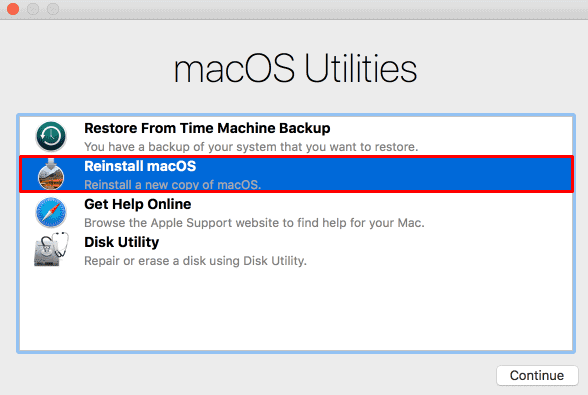
- Choose to Reinstall macOS.
- Continue the setup process, and provide any information required.
- And, when you have the option to install either Macintosh HD or Macintosh HD – Data, click on Macintosh HD.
- Wait until the setup process completes.
For Intel Macs
- Connect to the internet.
- Shut down.
- Press Power to start up the Mac.
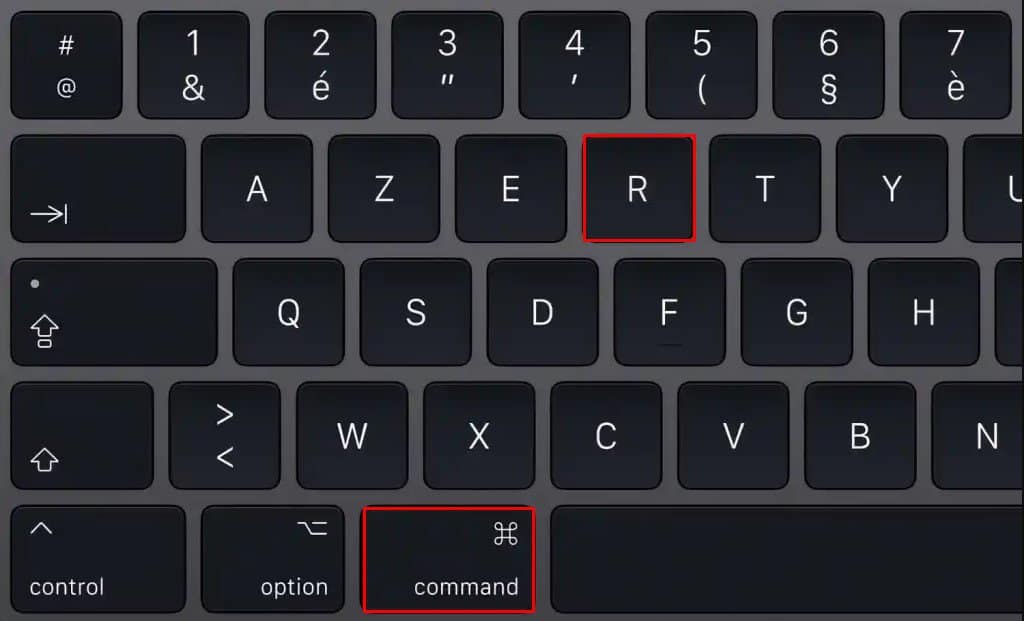
- Immediately after that, hold Command + R.
- Release the hold only after you see the Apple icon.
- Now, choose to Reinstall macOS.

- Continue the setup process, and provide any information required.
- And, when you have the option to install either Macintosh HD or Macintosh HD – Data, click on Macintosh HD.
- Wait until the setup process completes.

